Showing posts with label reuse. Show all posts

Saturday, October 11, 2014

13 Halloween Bottle Tutorials

Thirty-One Days of Halloween 
Day 8

Halloween Bottles

Happy 8th day of Halloween!
Only 22 days left until Halloween.


Grubby Halloween Bottles
Awesome tutorial from Magia Mia here

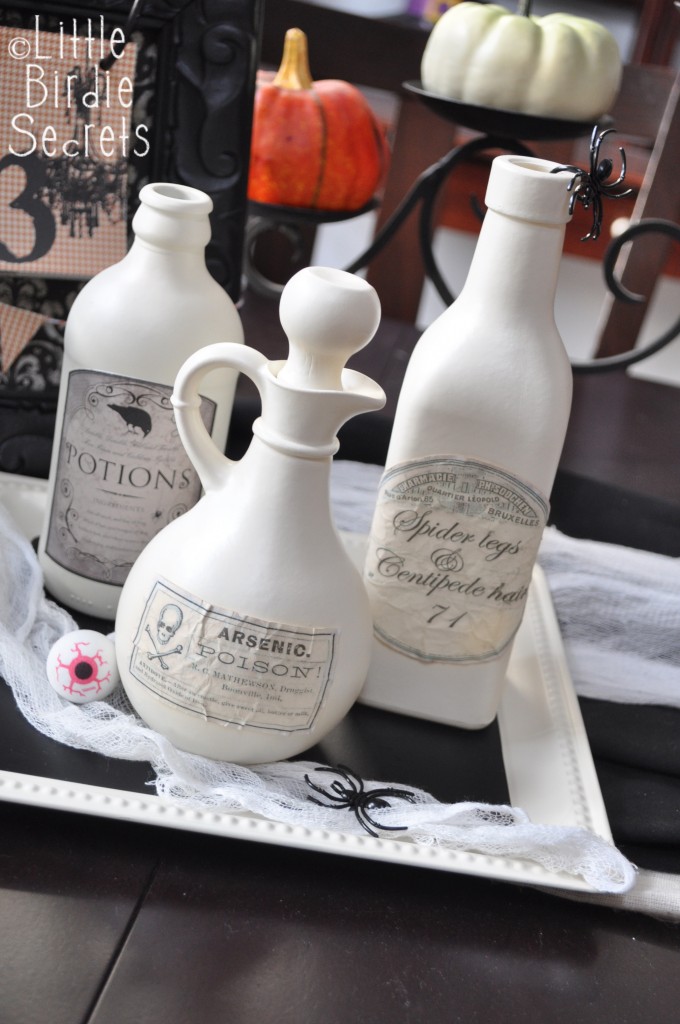
Classic White Halloween Bottles
Nice tutorial from Little Birdie Secrets here
Harry Potter Style Potion Bottles
with printable labels from Over the Big Moon Here

I love the look of this bottle

I need one of these cabinets in my Halloween Kitchen!

Everyone needs a little Magic Box

These cute little bottles are made out of beads

I made some of these for the Harry Potter Party
Great tutorial by Dave Lowe Design

I made some of these for the Harry Potter Party as well
Great tutorial HERE


Here is a simple but creepy Bottle
using a rubber snake

Bottles and candles

Halloween Cloche tutorial by Crafts and Coffee

Start collecting your jars. You can use pickle, salsa, olive or any food jars that go thru your kitchen. Also some call for plastic jars and soda bottles. I love projects that reuse items that would normally go to the dump, although I try to reuse and recycle as much as i can.

Here is a quick way to clean your jars.
Soak them in warm soapy water- at least 10 minutes. Most of the labels will come right off but sometimes you have a difficult one with extra sticky glue. For those I use dish soap and a paring (flat blade) knife. After you have removed as much of the glue as you can put dish soap directly on the glue spot and scrape it off with the side of the paring knife. I can usually remove the glue after a few scrubbing times.

Here is a link to my pinterest boards for bottles and labels
I have pinned loads of ideas and free printable labels

I had fun crafting these. I know you will too!
Ciao
April
~FriggleFraggle~
Follow me on Facebook

Saturday, February 22, 2014

DIY Jewelry Diplay

DIY Jewelry Display made from things you have around your house

 I like reusing things that might have ended up in the landfill if it hadn't been saved. I like jewelry. I make jewelry there for I have lots of it. I needed a place to display my bracelets not only for when I am not wearing them but for when I do a craft show.

Here is a tutorial on how to make a jewelry display made from things around your house.

Materials:
Tube from wrapping paper, foil, plastic wrap, paper towel and toilet paper
  *You will need 4 sizes -15",  12", 6" and 3"
Piece of sturdy cardboard - 9 1/2" x 5"
Exact o knife
Scissors
Pen
Hot glue gun and glue sticks
Chop Sticks
Fabric


Start with a sturdy cardboard base, cover the top in your choice of fabric leaving just enough fabric to wrap around and hot glue to the bottom. Make sure you do not make it bulky.
Some supplies

Cut your tubes to make the following sizes: 15", 12", 6" and 3". The 15 and 12 will be used as the top and the 6 and 3 used as the base to hold them up.

Cut tubes and connect
Cut a slit in the center of the 15 and 12  tubes just long enough to slide the smaller ones in. The 15" will have the 6" as a base and the 12" will have the 3" as a base.

Ready for fabric
Cover the smaller base tubes with fabric first wrapping around then securing with hot glue. Then move on to the longer tube trimming where necessary. Leave about 1/4" extra on the ends so you can fold the fabric over and glue to the inside.

Fabric covered
Using a pen hold your tube end on the back of the fabric and trace around it making a circle to cover the end. Apply a small amount of glue around the tube and place it down on the table on the circle. Trim the extra bits.
Trace and cut circle for end cap

Glue end for cover

Cover ends

Using a measuring tape, line up where you would like to position your tubes, draw a circle around them and trim the fabric in the area just inside of the circle you made.

Trim area for attaching base
For sturdiness I added a wooden chopstick to the center of each post having it go through the bottom and trim so it is flat. Hot glue the chopstick and the tube and place on the spots you trimmed.

Add chopsticks for support
There it is! You have made your own jewelry display out of materials you had around your house! Way to go you! Re-purposing always makes me feel good :)
Finished Product
Now to show off your bangles and bracelets at home or in a craft show.
Front View

Side View

Back View
Thanks for stopping by. I will be adding many more repurposing and DIY craft tutorials. Follow me to keep up. Also, if you  have any questions I will be happy to answer them.

Ciao,  April
~FriggleFraggle~

Saturday, February 9, 2013

Tattered Shabby Arm Warmer


Tattered Shabby Arm Warmer

https://www.etsy.com/listing/123158606/tattered-shabby-arm-warmer

Tattered Shabby Arm Warmer 

Lovely Victorian influenced cuff is ready to warm your arm in the Autumn breeze.
This tea stained stretch knit cuff is 4" long and embellished with a vintage lace, burlap and fabric flower with a beaded center.

Each one is Handmade made by FriggleFraggle, so no two will be the same and will have its own personality with the stitches and placement of each piece of cloth.

I always welcome questions, so please ask them before you purchase! :)

~FriggleFraggle~

Like me on Facebook .....
http://www.facebook.com/pages/Friggle-Fraggle/195896730486054

Thursday, July 5, 2012

Brown Leather Cuff Bracelet with Silver Eyelets

Brown Leather Cuff Bracelet with Silver Eyelets
https://www.etsy.com/listing/103104834/brown-leather-cuff-bracelet-with-silver

Brown Leather Cuff Bracelet with Silver Eyelets

Hand cut and tooled from beautiful brown belt leather.
This lovely Leather cuff can be worn by a man or a woman.
It measures 8 1/2" long X 1 1/2" wide
Secured with a heavy duty silver snap and embellished with silver eyelets.

Each Cuff is Handmade by
~FriggleFraggle~

Available for purchase in my etsy shop here:
www.FriggleFraggle.etsy.com

Saturday, February 11, 2012

T-Shirt Bags Project

              T-shirt Bag Project!

Ok, who is ready for another project? This one is quick and easy. You can make one or many in just a short time.

 All you will need is:* some old t-shirts that you love but are stained or you have grown tired of wearing but just can't get rid of,-those are the best :)  *a good pair of scissors and *a safety pin.

Now, Go grab those shirts and Get ready for some fun.


Step 1: Pick your shirt and cut off the sleeves. I cut them on the outside of the seam so the seam is left on the shirt. It seems to give it a little more support, as they will be your handles, but this is up to you. Cut open the sleeve at the seam and cut off the sewn edge. With the sleeve open cut it into long 1/4" wide strips. These are important, they will be the ties for the bag. Pull the strips so they stretch out. Set the strips aside for now.

Step 2:Cut off the neck. Start on one side of the neck and cut down toward the bottom of the shirt then curve around to follow slightly below the ribbed neck line. This will be the opening for your bag.

Step 3:Make 3 small cuts in the bottom seam of your t shirt, make sure you don't cut thru the sewn seam that holds it together. Space them equally apart. I cut one slit on the top- in the middle and two on the bottom -about a quarter of the way in on each side. Just eye it or get your tape out but it won't matter if you are close  :) This should make a little casing to slide your fabric thru.
Step4:Time for the little strips of fabric that you put to the side. Take the 3 longest ones and put a safety pin on one end of one. Slide it thru one cut section of the shirt seam. Then do the same for the other two sections. Your strips should be long enough they won't slip back thru the other side.

Step 5:Pull each section tight. Tie the sections. I double knotted. Then take one strip and tie it to the next section strip all the way around until they have all been tied with another section. (I did this just to make sure it is strong enough, you can tie it how you feel suitable for you).

There! Done! Now you have your very own handmade t-shirt bag.

I made a few. I will be giving some out as gift to friends and family.
We will be doing this craft with the young ladies in our Girl's Club on Monday at Co-op. I hope they enjoy it :)
These are great for carrying groceries, If I can remember to bring them with me!

Let me know how you did.
Happy Crafting!
~Friggle Fraggle~

Up, Down Re-

UP, Down, Re- Cycling that is  :)

Upcycling is the process of converting waste materials or useless products into new materials or products of better quality or a higher environmental value.
The first recorded use of the term upcycling was by Reiner Pilz of Pilz GmbH in an interview by Thornton Kay of Salvo in 1994.[1]
We talked about the impending EU Demolition Waste Streams directive. "Recycling," he said, "I call it downcycling. They smash bricks, they smash everything. What we need is upcycling where old products are given more value not less." He despairs of the German situation and recalls the supply of a large quantity of reclaimed woodblock from an English supplier for a contract in Nuremberg while just down the road a load of similar blocks was scrapped. In the road outside his premises, was the result of the Germans' demolition waste recycling. It was a pinky looking aggregate with pieces of handmade brick, old tiles and discernible parts of useful old items mixed with crushed concrete. Is this the future for Europe?
Downcycling is the process of converting waste materials or useless products into new materials or products of lesser quality and reduced functionality. The goal of downcycling is to prevent wasting potentially useful materials, reduce consumption of fresh raw materials, reduce energy usage, reduce air pollution and water pollution, and lower greenhouse gas emissions (though re-use of tainted toxic chemicals for other purposes can have the opposite effect) as compared to virgin production. A clear example is plastic recycling, which turns the material into lower grade plastics.

Recycling is processing used materials (waste) into new products to prevent waste of potentially useful materials, reduce the consumption of fresh raw materials, reduce energy usage, reduce air pollution (from incineration) and water pollution (from landfilling) by reducing the need for "conventional" waste disposal, and lower greenhouse gas emissions as compared to virgin production.[1][2] Recycling is a key component of modern waste reduction and is the third component of the "Reduce, Reuse, Recycle" waste hierarchy.

To reuse is to use an item more than once. This includes conventional reuse where the item is used again for the same function, and new-life reuse where it is used for a different function. In contrast, recycling is the breaking down of the used item into raw materials which are used to make new items. By taking useful products and exchanging them, without reprocessing, reuse help save time, money, energy, and resources. In broader economic terms, reuse offers quality products to people and organizations with limited means, while generating jobs and business activity that contribute to the economy.

Trashion (a portmanteau of "trash" and "fashion") is a term for art, jewelry, fashion and objects for the home created from used, thrown-out, found and repurposed elements. The term was first coined in New Zealand in 2004[1] and gained in usage through 2005.[2]
Initially trashion was used to describe art-couture costume usually linked to contests or fashion shows; however, as recycling and 'green' fashion become more prevalent, trashion has taken a turn for the more wearable. The term is now widely used in creative circles to describe any wearable item or accessory that is constructed using all or part materials that have been recycled, including clothing that has been thrifted and reconditioned.

*From Wikipedia, the free encyclopedia

What is the difference? Do you know?
They all sound fun to me!

Happy Crafting!
~Friggle Fraggle~

Saturday, January 14, 2012

"No Thread Left Behind"

I wanted to make a new challenge for my self but anyone is welcome to join in.
It is called "No Thread Left Behind" using an old pair of Blue Jeans.
The object is to use the entire pair of jeans- I mean every last thread.
You can repurpose, recycle and reuse.
I am curious how much we can make having to find ways to use every bit of an object that many just pitch in the dump when it still has so many uses.

I will be posting things that I make as I go, hopefully some pics to go along with them.
Feel free to post what you make :)

Happy Crafting!
FriggleFraggle

Tutorial: Pictures and Frames

 Hey there! I decided to add in a tutorial for the Salem Witch Academy frames just in case there is someone who needs a little help with tha...