Showing posts with label upcycle. Show all posts

Saturday, May 17, 2014

Thrift Store Finds

Thrift Store finds of the day....

 Bird cage, flower holder, old umbrella, misc tea cups, bracelets and tiny cauldron.

I love going to thrift stores. I have been to many and always have a favorite. Right now my favorite is one that I visit a couple times a month. Sometimes I pop in to look for specific items, other times I get lost for hours looking through every nook.

I want thrift stores to succeed but I tend to stay away from the big box stores that have prices that aren't so thrifty. When I first started thrifting here I found a little hole in the wall where everything was very cheap. .50 for a pair of jeans .25 and .50 for other clothing. It was more like yard sale prices and there was new stuff all the time. I could afford to clothe myself and my children through those stores and dress nice like I had shopped at the mall.

Eventually the stores that I frequented raised their prices and were comparable to Walmart prices- for used clothes- sorry NO. I had to find some new ones to scavenge.  Then I found this one. It is ran by a church in our small town. It started out in a room attached to a construction business. They became so popular that they had to expand and ended up moving to a bigger store. The prices were raised a little because of the rent for the new store.

Now though, I guess like everything else, the prices are starting to get out of my range. Time to start hunting for a new one :) I will still shop there though until they are no longer reasonable. So lets hope they stay this way a little longer.

Here are a few great finds for today.
This is a lovely Sage Green metal bird cage with cute little metal birds on it. It has 2 hinges allowing it to open at the top.

Here is a metal wall sconce for flowers. It's not too old but it has seen some use. I will give it a nice coat of paint. I seem to be attracted to these for some reason but I don't hang flowers on my wall. 

I always grab the metal bracelets or bangles. I wear them, give them to friends and upcycle them. I will do a post of the ways I upcycle them sometime.


Lately I have been making Mossy Terrariums and Jars. I have been wanting to do a tea cup Mossy Terrarium so when I saw these I thought they would be cute to start with.

To go along with the mossy Terrarium tea cups I thought this little cauldron would be a cute addition.

Last but not least the ugly stained old umbrella. I plan on removing the cover and turning it into a crocheted sun parasol to help keep the hot summer sun off my head. I have already had a sunburn once this year. No fun for my light skin!


Well, I hope you enjoyed viewing my finds today. I will post what the items are transformed into.

Check back for updates and pics of other finds!

Ciao~

Saturday, February 9, 2013

Tattered Shabby Arm Warmer


Tattered Shabby Arm Warmer

https://www.etsy.com/listing/123158606/tattered-shabby-arm-warmer

Tattered Shabby Arm Warmer 

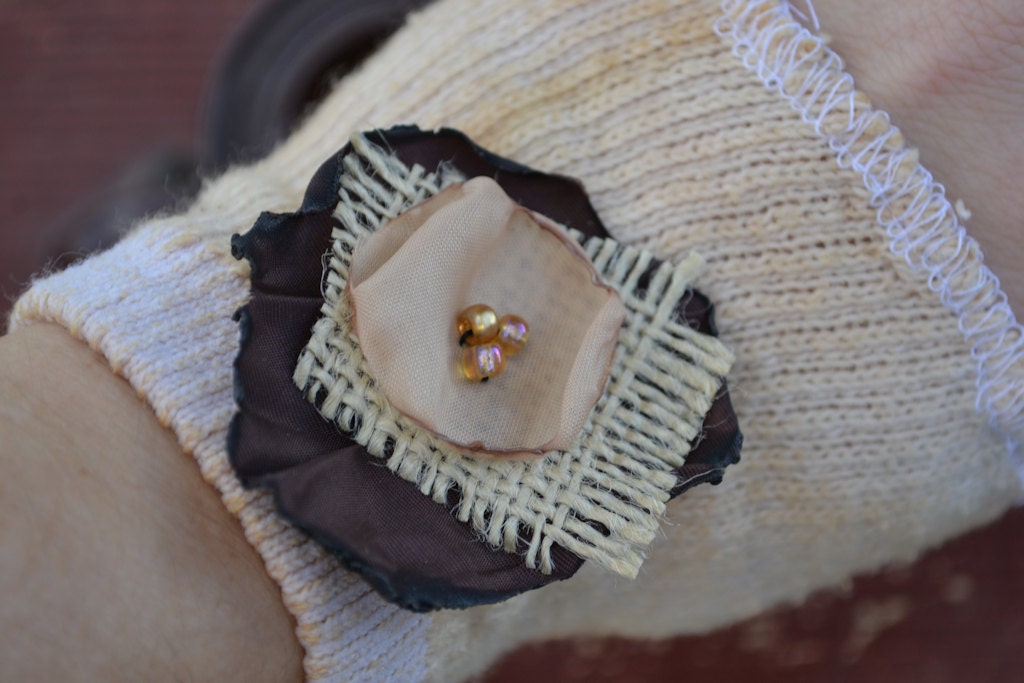
Lovely Victorian influenced cuff is ready to warm your arm in the Autumn breeze.
This tea stained stretch knit cuff is 4" long and embellished with a vintage lace, burlap and fabric flower with a beaded center.

Each one is Handmade made by FriggleFraggle, so no two will be the same and will have its own personality with the stitches and placement of each piece of cloth.

I always welcome questions, so please ask them before you purchase! :)

~FriggleFraggle~

Like me on Facebook .....
http://www.facebook.com/pages/Friggle-Fraggle/195896730486054

Wednesday, September 26, 2012

Pink Half Sweater Hooded Hoodie Crop with White Design


Pink Half Sweater Hooded Hoodie Crop with White Design


Pink Half Sweater Hooded Hoodie Crop with White Design

This half sweater Hooded Hoodie crop is made from found Sweaters..Works great with your favorite pair of jeans for that layered look :)

SIZE: Small/Medium
Sleeve length from shoulder to cuff: 10 "
Back neckline to bottom: 10 "

Each one is unique and one of a kind, sewn and serged on my machines at home.
Machine washed and dried before turning them into these sweet little treats!

~ Each Sweater Jacket Coat is Handmade by FriggleFraggle.

~International Buyers: Please contact me for shipping details.

~FriggleFraggle~
www.FriggleFraggle.etsy.com

Monday, September 24, 2012

Black Skirt with Blue Leopard Print


Black Skirt with Blue Leopard Print


Black Skirt with Blue Leopard Print 

Unique handmade skirt fashioned from repurposed mixed fabrics and materials.

Size: Children's 
Skirt is 11" long, 19" with the fringe 
Waist is 20"/22"
Waist band is elastic

Each one is Handmade by FriggleFraggle, so no two will be the same. Each having its own personality with the stitches and placement of each piece of cloth.

I always welcome questions, so please ask them before you purchase! :)

~FriggleFraggle~
www.FriggleFraggle.etsy.com

Like me on Facebook .....
http://www.facebook.com/pages/Friggle-Fraggle/195896730486054

Saturday, March 17, 2012

Sweater to Skirt Project

How-To   DIY: Sweater to Skirt and Booties Project

If you know me you know that I have sweaters. Not just one or two but many, many more. I not only love to wear them, I like to cut them up and make them into other unique items to wear.
     I found this sweater and knew that I would never wear it just like it was and that it needed some transformation.  It later became a skirt and the sleeves became booties or house slippers perfect for cold winter nights.
Here's how it's done  :)

From this


to this.....
Cut sleeves off
First cut the sleeves off the sweater. Cut seam at shoulders so the top is all the way opened. This will become the bottom of your skirt.

Make a casing and add elastic
Fold the bottom over and make a casing to put the elastic band in. This will be the top of your skirt. Measure your waist with the elastic then cut about an inch shorter. I like my elastic to be a little loose. Use a saftey pin to lead the elastic thru the casing. Careful not to let it twist inside, it will be uncomfortable if the elastic gets flipped. Pull thru and sew elastic closed overlapping the ends. Close up the casing.
Finished skirt
I finished the bottom edges where the neckline and sleeves were. After the sleeves were removed it made slits on each side. You can leave those open or sew them closed. I sewed mine together a little but left some slit on each side.  Skirt is DONE! You can stop there or make the booties to match  :)

Making the booties
Time for the booties. I used a shoe and cut around it on a piece of old sweatshirt to make the bottom of the bootie.
   Turn the sleeve inside out and sew the arm hole to the sweatshirt cut out.
After I sewed it together I had to go back and take in the back of the leg a little. It didn't take much to make it fit snuggly.

Stitch bottom to leg
Booties are DONE!

You can add puff paint to the bottom when you are done if you want to keep from slipping.

Ta-Da!  You are done. New outfit from just one sweater. You can wear the booties in your boots as warmers or just lounging around the house.


Happy Crafting
~FriggleFraggle~


Saturday, March 10, 2012

Brown Tan Cream Flower Hair Pin

Brown Tan Cream Flower Hair Pin

This 2" fabric flower is secured to a bobby pin that can easliy slip into your hair. It has three clear beads in the center. Perfect for everyday use or that special occasion. Can be worn in your hair or on your shirt.

*Available in other colors, styles and sizes. Just send a convo with details.

Each one is unique and Handmade by
~FriggleFraggle~       

Available for purchase in my Etsy shop @
http://www.etsy.com/listing/94933426/brown-tan-cream-flower-hair-pin

Friday, March 9, 2012

Pink Flower Hair Pin


Pink Flower Hair Pin

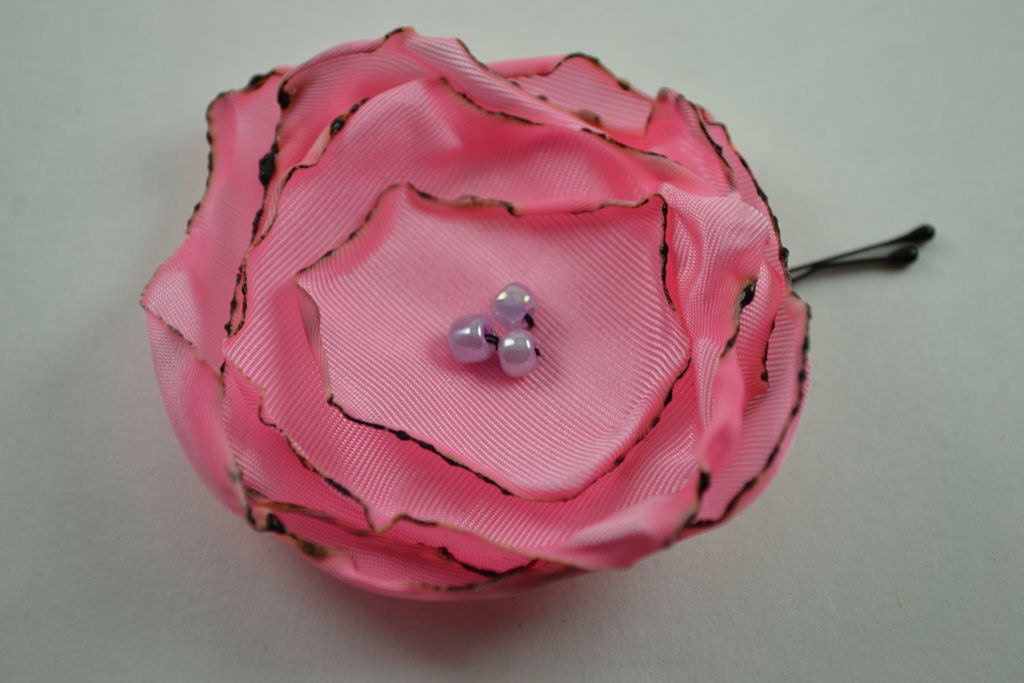
This cute little Flower Hair Pin is 2" with three little beads in the center.
Secured to a bobby pin to easily slip into your hair.

*This listing is for one Flower on a bobby pin.
If you would like a custom color, amount, size or Flower on a pin back send a convo with details.

Handmade by
~FriggleFraggle~       

Available for purchase in my Etsy shop @
http://www.etsy.com/listing/94928518/pink-flower-hair-pin

Pink Shiny Shirt and Striped Corset Vest


Pink Shiny Shirt and Striped Corset Vest

Pink shiny shirt with 3/4 sleeves. Faux black lacing at shoulders.
Striped pink, black and white vest corset with eyelet lacing collar and waist.
Size Medium/Small

*This is a 2 piece set which includes Shirt and Vest.
Flowers and Necklace sold seperately.

Handmade By
~FriggleFraggle~       

Available for purchase in my Etsy shop @
http://www.etsy.com/listing/94926387/pink-shiny-shirt-and-striped-corset-vest

Saturday, February 11, 2012

T-Shirt Bags Project

              T-shirt Bag Project!

Ok, who is ready for another project? This one is quick and easy. You can make one or many in just a short time.

 All you will need is:* some old t-shirts that you love but are stained or you have grown tired of wearing but just can't get rid of,-those are the best :)  *a good pair of scissors and *a safety pin.

Now, Go grab those shirts and Get ready for some fun.


Step 1: Pick your shirt and cut off the sleeves. I cut them on the outside of the seam so the seam is left on the shirt. It seems to give it a little more support, as they will be your handles, but this is up to you. Cut open the sleeve at the seam and cut off the sewn edge. With the sleeve open cut it into long 1/4" wide strips. These are important, they will be the ties for the bag. Pull the strips so they stretch out. Set the strips aside for now.

Step 2:Cut off the neck. Start on one side of the neck and cut down toward the bottom of the shirt then curve around to follow slightly below the ribbed neck line. This will be the opening for your bag.

Step 3:Make 3 small cuts in the bottom seam of your t shirt, make sure you don't cut thru the sewn seam that holds it together. Space them equally apart. I cut one slit on the top- in the middle and two on the bottom -about a quarter of the way in on each side. Just eye it or get your tape out but it won't matter if you are close  :) This should make a little casing to slide your fabric thru.
Step4:Time for the little strips of fabric that you put to the side. Take the 3 longest ones and put a safety pin on one end of one. Slide it thru one cut section of the shirt seam. Then do the same for the other two sections. Your strips should be long enough they won't slip back thru the other side.

Step 5:Pull each section tight. Tie the sections. I double knotted. Then take one strip and tie it to the next section strip all the way around until they have all been tied with another section. (I did this just to make sure it is strong enough, you can tie it how you feel suitable for you).

There! Done! Now you have your very own handmade t-shirt bag.

I made a few. I will be giving some out as gift to friends and family.
We will be doing this craft with the young ladies in our Girl's Club on Monday at Co-op. I hope they enjoy it :)
These are great for carrying groceries, If I can remember to bring them with me!

Let me know how you did.
Happy Crafting!
~Friggle Fraggle~

Red Sweater Leg Warmers


LEG WARMERS!


Red Sweater Leg Warmers
with Black Lace Trim
and Silver Buttons

available for purchase on my etsy site @

Taking custom requests :)
Would you be interested in seeing a tutorial on how to make these?
Leave a comment and I might plan on making one soon.

Happy Crafting!
~FriggleFraggle~


Wednesday, January 18, 2012

"No Thread Left Behind" Project

"No Thread Left Behind" Project

I took an old pair of jeans and cut it into pieces.

*Note that I kept every piece even the threads and chunks that were falling while I was dissecting, I will be using every thread for something   :)

I cut the jeans into the following:
-Cut the seams off the pant legs, kept the sewn seams and have long pieces of jean fabric w/o any sewn seams now.
-Took the back pockets off with a seam ripper.
-Took the zipper out with a seam ripper. Have a zipper to reuse and some jean chunks from the part that covered the zipper.
-I cut the top of the jeans at the seam at the belt area. I removed the belt loops keeping the belt area whole with the button. Have belt loops separate now.
-If you are careful how you cut the jeans around the belt and pocket area you can end up with "inside out" pockets. The front pocket of the jeans are kept as whole pieces. * in the picture, bottom-middle.


Now to get started on transforming the pieces into something new....


Saturday, January 14, 2012

"No Thread Left Behind"

I wanted to make a new challenge for my self but anyone is welcome to join in.
It is called "No Thread Left Behind" using an old pair of Blue Jeans.
The object is to use the entire pair of jeans- I mean every last thread.
You can repurpose, recycle and reuse.
I am curious how much we can make having to find ways to use every bit of an object that many just pitch in the dump when it still has so many uses.

I will be posting things that I make as I go, hopefully some pics to go along with them.
Feel free to post what you make :)

Happy Crafting!
FriggleFraggle

Tutorial: Pictures and Frames

 Hey there! I decided to add in a tutorial for the Salem Witch Academy frames just in case there is someone who needs a little help with tha...